A Quick Tableau Data Source Mapper
July 13, 2021 - Automation, Tableau
Update June 28, 2025: Glitch (where I was hosting the data source mapper) has shut down their app hosting. I'm now hosting the data source mapper myself, and you can now find the code on GitHub.
Update May 20, 2022: I've since updated the data source mapper with more features making the code more complex and not exactly matching what is in this post. The parsing process is the same so hopefully, you are still able to understand the main points on how to build a tool like this. If you have any questions, please add a comment below.
The other day an analyst friend of mine was talking about how she had just received a massive workbook and needed to rebuild some of the dashboards. Cool, no problem! Except for one problem... she had no clue which of the 30+ data sources mapped to which of the 200+ worksheets. 😵 She said she would have to resort to manually going through each and every worksheet to see which data sources were being used! 😱 Thankfully her workbook was published to Tableau Server/Online and I was able to write a quick Metadata API query to help. (Let me know if you want to learn more! 😉) But that got me thinking "Why can't this be easier?" Why should someone have to publish their workbook, and learn graphQL just to get a mapping of data sources to worksheets? In addition, what if you don't want to or are not able to publish your workbook? Or perhaps you have an older version of Tableau Server that doesn't have the Metadata API? You might even have a newer version of Tableau Server but the API may not be enabled by your admin. While we were chatting, one of our colleagues made a joke about me making an application that could do this data source to worksheet mapping, so I did!
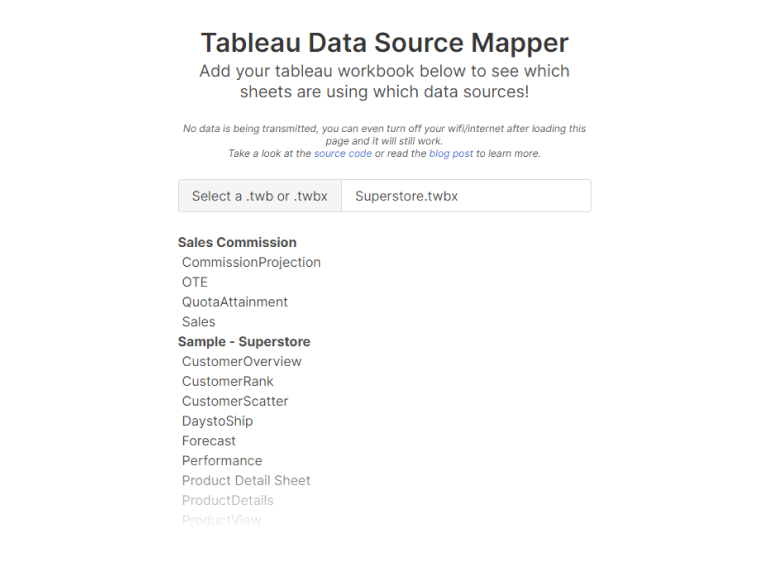
In this post, I'll be going through the main pieces of code that make up the Data Source Mapper. A free and simple tool that will list out all the data sources and their associated worksheets for any workbook. Try it out for yourself! Simply choose a workbook by clicking "Select a .twb or .twbx" and you'll instantly see a readout of each data source and the worksheets where it is used. And no need to worry about sensitive data, the workbook is not actually uploaded. This means you can even load that page, turn off your wifi and try it out, it will still work!
Now that you've seen it in action let's walk through the code.
Don't want the walkthrough and just want the code? You can find it all on GitHub!
File set up
This quick little app just uses basic JavaScript and HTML, no fancy back-end servers here and everything runs in the client. All you'll need is index.html, script.js, and style.css. You can even build and run this locally without using a server, just double-click on the index.html file. I'll be using Bulma for my styles and just a little bit of custom CSS. You can find my CSS file here. As for the index page, this is where we'll set up the input button and bring in some external libraries. I'm going to be using Vue.js in this project so I'm going to bring in that library at the top of the index page. (If you want to learn more about Vue I recommend taking a look at this quick video overview.) I'm also using a library called JSZip to handle twbx files. Did you know that twbx files are just zip files with a different file extension? This means you can unzip them using your favorite tool to see what's inside, including the base twb file which is just XML! Now that we have our files set up, let's start adding content.
Create an input
The most prominent feature of the index page is the file <input>. This is how the app receives the workbook to analyze.
<input class="file-input" type="file" accept=".twb,.twbx" @change="processFile($event)" />
Here the most important parts are the type and accept attributes. By using type="file" we are able to let the user select a file on their computer. As for accept=".twb,.twbx", this specifies what types of file extensions we are willing to accept. You'll notice I also have a class attribute set to "file-input", this, along with some labels and the Bulma framework, make the input look nicer than the default style. As for the @change attribute, this references the function we want to run whenever this input gets a new file. Since I'm using Vue I'll be using @change instead of onchange but the idea is the same. We'll go through what this function does below.
Create your Vue app
This part is optional, you don't need to use Vue to make this app but I like the simplicity of using Vue to update things in the DOM. The functions will be roughly the same without Vue if you'd like to cut it out. You'll just need to write your own code to display all the outputs. The nice thing about Vue is you can create variables that automatically update for your end-users as you update them in your code. With Vue, you can display any variables by using two curly braces and for this app, I just have three variables: fileName, errorMessage, and map.
The fileName is what I'm using to show the user which workbook file they just selected:
<span class="file-name"></span>
The errorMessage will be used to show any messages if something goes wrong:
<p class="error"></p>
And most importantly the map variable is where I'll be storing the data source to worksheet mapping:
<div v-for="(sheets, dataSource) in map">
  <p class="dataSource"></p>
  <p class="sheet" v-for="sheet in sheets"></p>
</div>
Here I'm leveraging Vue's v-for directive to loop through each data source and display its name and the associated worksheets. We can update these variables as we parse through the workbook data.
Get the XML data
I mentioned earlier that all twb files are just XML, and twbx files are just that XML files zipped up with other files (data, images, etc.). Feel free to open up a twb file in your favorite text editor and take a look! Because of this, we're able to do what you might have heard as "XML hacking". It's called hacking because doing so is unsupported and since Tableau can change the structure of the XML at any time it's not always reliable. For simple things like this, you'll probably be set for a while but there is no guarantee that it will work in the future without some tweaks. Note: We won't be modifying anything today but if you try out XML hacking make sure to always create a backup file first!
The first thing we need to do is get the file that the user has selected in our input. This is the function tied to the change event for the input, processFile. In the index.html we are passing an event, this is the change event that occurs whenever a new file is selected. Within this function, we first get the file information:
let workbook = event.target.files[0];
this.fileName = workbook.name;
let type = workbook.name.split(".").slice(-1)[0];
Here we are getting the information about the file that was uploaded and calling it workbook. I'm setting the fileName variable to the name of the file so it is displayed for the end user. Finally, I am getting the extension of the file by scraping the text after the last period and calling that type. Now that we have the file information we need to get the actual contents of the file. Depending on whether we received a twb or twbx file the process will be different. Let's look at the twbx file first.
let zip = new JSZip();
zip.loadAsync(workbook).then(
  (zip) => {
    const twbName = Object.keys(zip.files).find((file) => file.includes(".twb"));
    const twb = zip.files[twbName];
    twb.async("string").then((content) => {
      if (!content) return (this.errorMessage = "No twb file found!");
      this.readXML(content);
    });
  },
  () => {
    alert("Not a valid twbx file");
  }
);
Let's walk through what is going on here:
- We create a new instance of JSZip to help us unzip the file called
zip. - Next we load the data from the zip file so we can work with its contents.
- There is always one twb file in the twbx but we don't know the name. It is not safe to rely on the name of the outer twbx so to find its name we'll search through the list of files and pick out the one that ends in ".twb".
- Then we can use this
twbNameto actually get the twb file and load its contents as a string. - Once we have loaded the file as a string we are ready to pass that string to our
readXMLfunction to read and parse the XML.
How about just a twb file? It's a bit simpler.
let reader = new FileReader();
reader.onload = (evt) => {
  if (!evt.target.result) return (this.errorMessage = "No file found!");
  this.readXML(evt.target.result);
};
reader.readAsText(workbook);
- Create a new FileReader object called
reader. - Define an event handler for the
onloadevent that will give us the contents of the file once a file is loaded into the reader object. - Load the workbook as a text file into the reader object and therefore trigger the handler we just defined and send the data to our
readXMLfunction.
Parse the XML
Now that we've retrieved the raw XML from either a twb or twbx we can parse it and pull out the data we need with our readXML function.
this.map = {};
let parser = new DOMParser();
let xmlDoc = parser.parseFromString(xml, "text/xml");
let worksheets = xmlDoc.getElementsByTagName("worksheets")[0].children;
- First reset the
mapvariable to a blank object, this is where we will add data sources and worksheets later and we don't want any leftover data from previously analyzed workbooks. - Next create a new DOMParser object called
parser. - Then we can use the parser to parse the file contents as XML.
- Once we've done that we can start to search for worksheets by looking for the
<worksheets>object.
If you open the twb file in a text editor you'll see that this object houses all worksheets and each worksheet has a <datasources> object. We can traverse down to this object by looping through each worksheet and navigating through <worksheet> to <table> to <view> to <datasources>. Try console logging each of the parts below to see what kind of data you receive and navigate the XML. Let's loop through each of the worksheet objects in worksheets to extract the data we need.
for (let worksheet of worksheets) {
  let dataSources = worksheet
    .getElementsByTagName("table")[0]
    .getElementsByTagName("view")[0]
    .getElementsByTagName("datasources")[0].children;
  for (let dataSource of dataSources) {
    let dsName = dataSource.attributes.caption
      ? dataSource.attributes.caption.nodeValue
      : dataSource.attributes.name.nodeValue;
    let wsName = worksheet.attributes.name.nodeValue;
    if (this.map[dsName]) {
      this.map[dsName].push(wsName);
    } else {
      this.map[dsName] = [wsName];
    }
  }
}
- First, loop through each worksheet in
<worksheets>. - Next, traverse through the XML to get to the
<datasources>object. - For each child object within the
<datasources>object we'll loop through again since a worksheet can be using multiple data sources. - Pull out the name of the data source as
dsName. This can be stored in either the "caption" attribute or the "name" attribute. Try caption first as that will have the friendly name of the data source. "Name" can sometimes look likesqlproxy.0prmqg40hzadjm1d063if03cnqopwhich isn't helpful. However, sometimes only "name" exists so we need to check both. - Then store the data in our
mapobject as a property with an array for the list of worksheets. If the data source property already exists, then just push the worksheet name into its array. If it does not already exist, create a new property with the data sources name whose value is an array with the worksheet name.
The structure of the map variable would look something like this:
{
  "Sample - Superstore": ["Sheet 1", "Sheet 3"],
  "World Indicators": ["Sheet 2", "Sheet 3"]
}
At this point, you will see the data sources and their worksheets displayed automatically on the screen since we are using Vue and the variables in the index.html file.
Try it out!
That's it, you're all set to easily display the data sources and relevant worksheets for any workbook file. Check out the full code below and let me know if you try it out! Learned something new? Subscribe and never miss a new post!
Subscribe
Sign up to never miss a post!

About Me
Subscribe
Sign up to never miss a post!
Popular Posts
A Quick Tableau Data Source Mapper
July 13, 2021
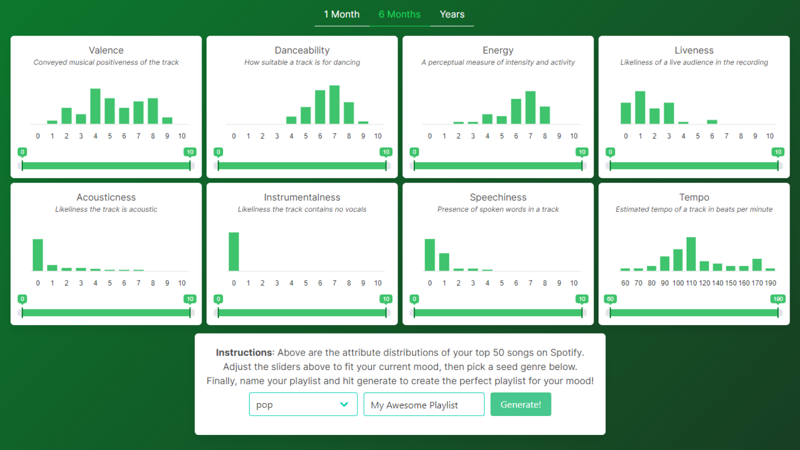
Spotify Playlist Generator
November 29, 2021Topic Request
Want me to cover a specific topic? Let me know!
Leave a comment